Import from PostgreSQL
Import a PostgreSQL table into Nile as a managed table with version control.
The wizard has four steps (Connection, Tables, Preview, Performance). You can move back and forth without losing your selections.
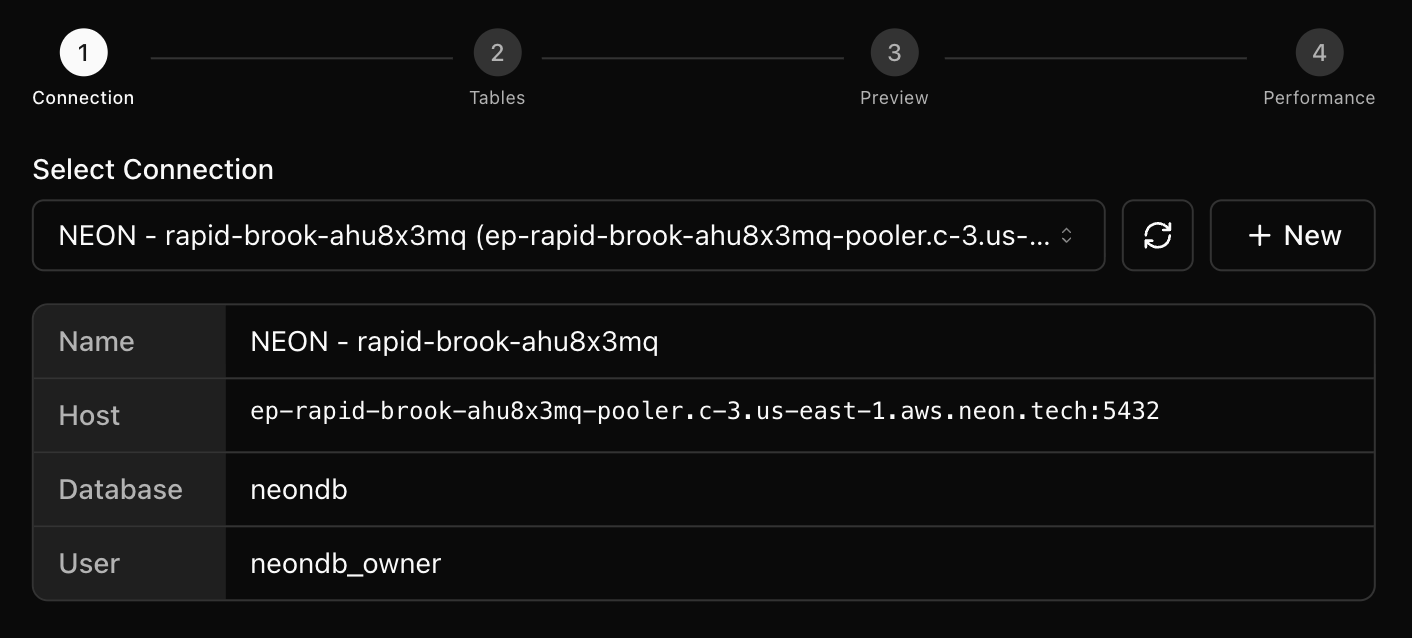
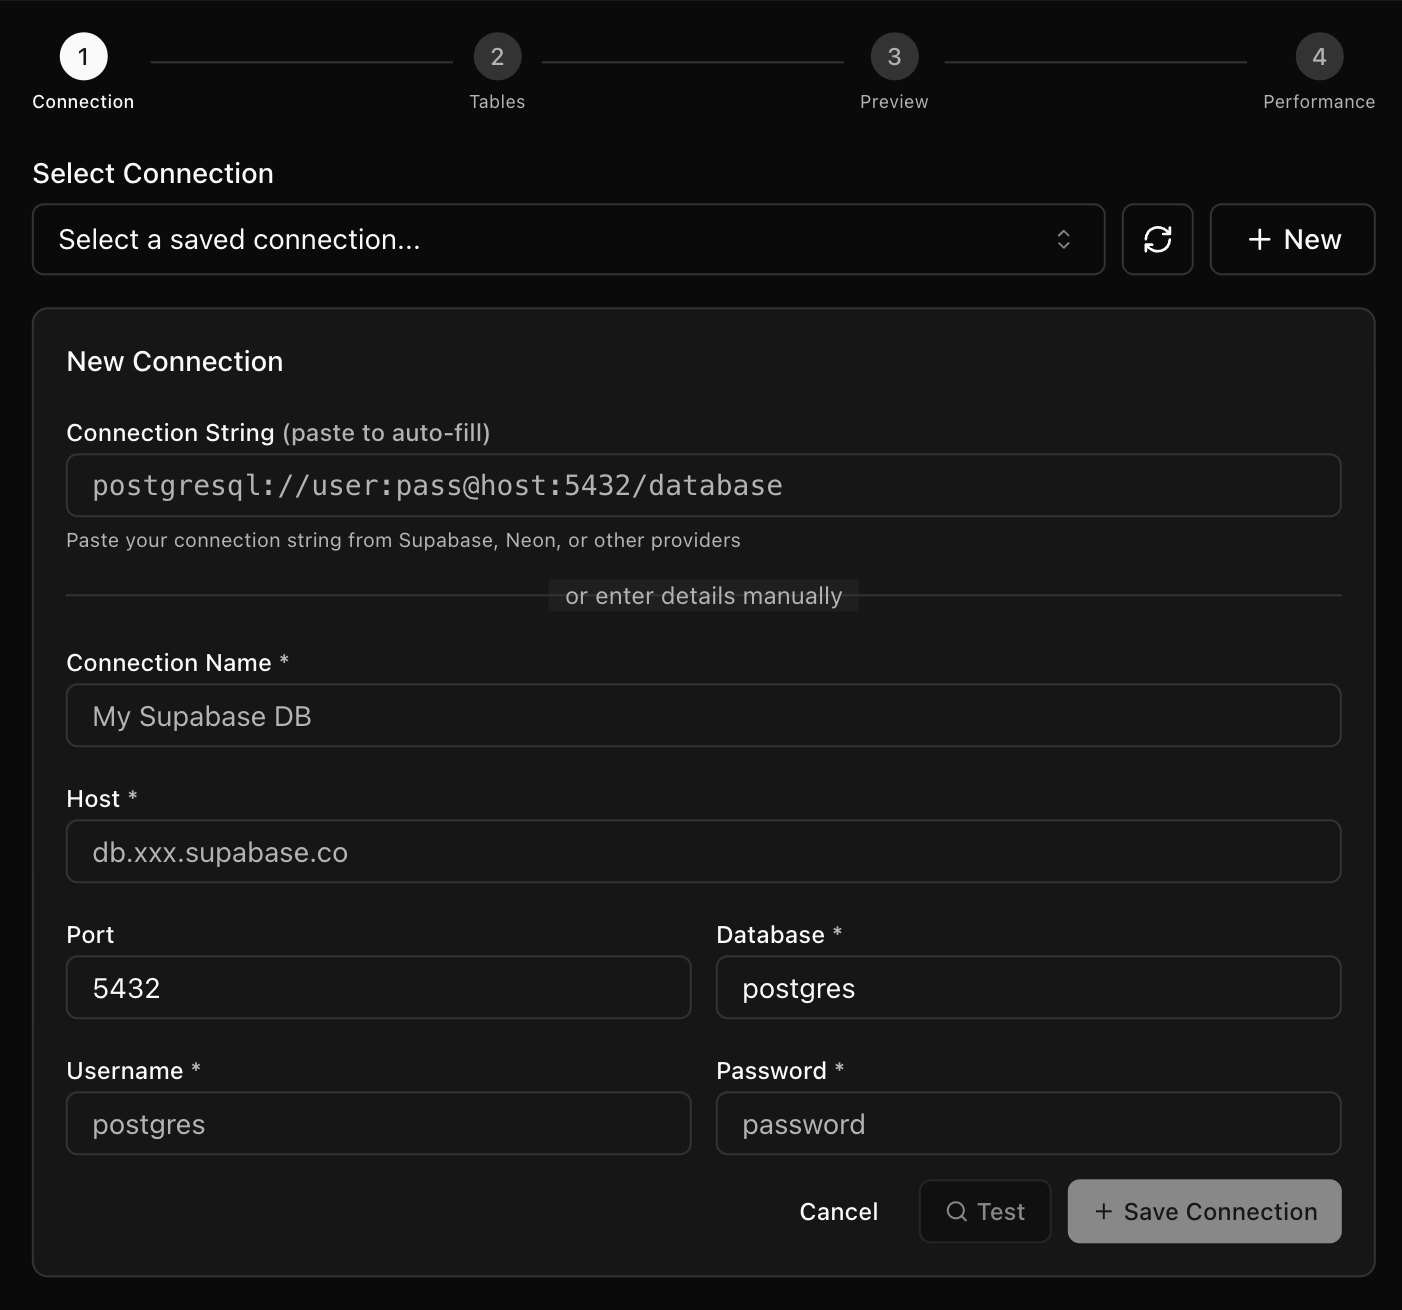
Step 1: Choose or Create a Connection
Select an existing connection or click New to add one. You can paste a connection string from Supabase, Neon, RDS, or another PostgreSQL provider to auto‑fill details. Test the connection and save it for future imports.
- Refresh reloads the list of saved connections.
- Connection details show name, host:port, database, and user for the selected connection.
- Test validates the credentials; Save Connection is enabled after a successful test.
Step 2: Select the Source Table
Choose a table from the list. The table list includes schema, row estimates, and size to help you plan the import.
The Columns column currently shows the table type (for example, BASE TABLE). Row counts and sizes are estimates.

Step 3: Preview Data and Schema
Nile samples the source table to detect schema and show a preview. Confirm that the data and types look correct.
The footer shows the source table, number of columns, estimated rows, and the sampled size.

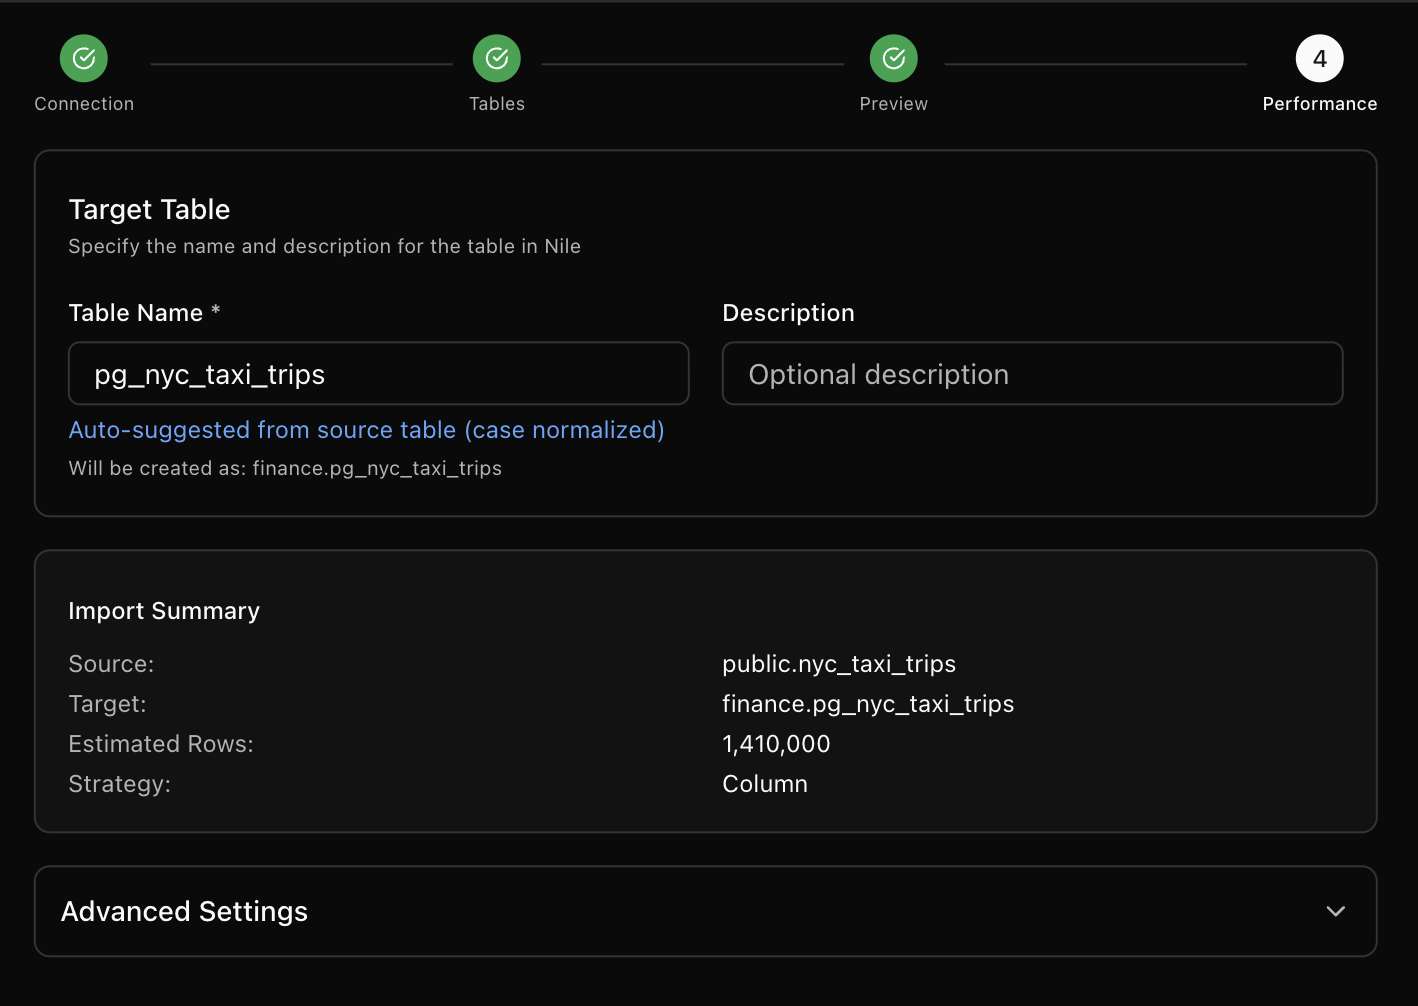
Step 4: Configure Performance Settings
Set a target table name and optional description. For large tables, use the Advanced Settings to tune import strategy and parallel reads.
Nile auto‑suggests a table name from the source (case normalized). The helper text Will be created as shows the target database and table name.
- Import Strategy: Auto, JDBC Direct, or SQL Dump (auto uses JDBC under ~1GB and SQL Dump over ~1GB).
- Partition Strategy: Auto, Column‑based, Hash predicates, or Single‑threaded.
- Column‑based: Choose a partition column, review min/max, and set parallel readers.
- Predicates: Set number of hash partitions for parallel reads.
Use the distribution analyzer to check skew before committing to a partition column. Partitioning only affects how the source table is read in parallel; it does not change the Iceberg layout.

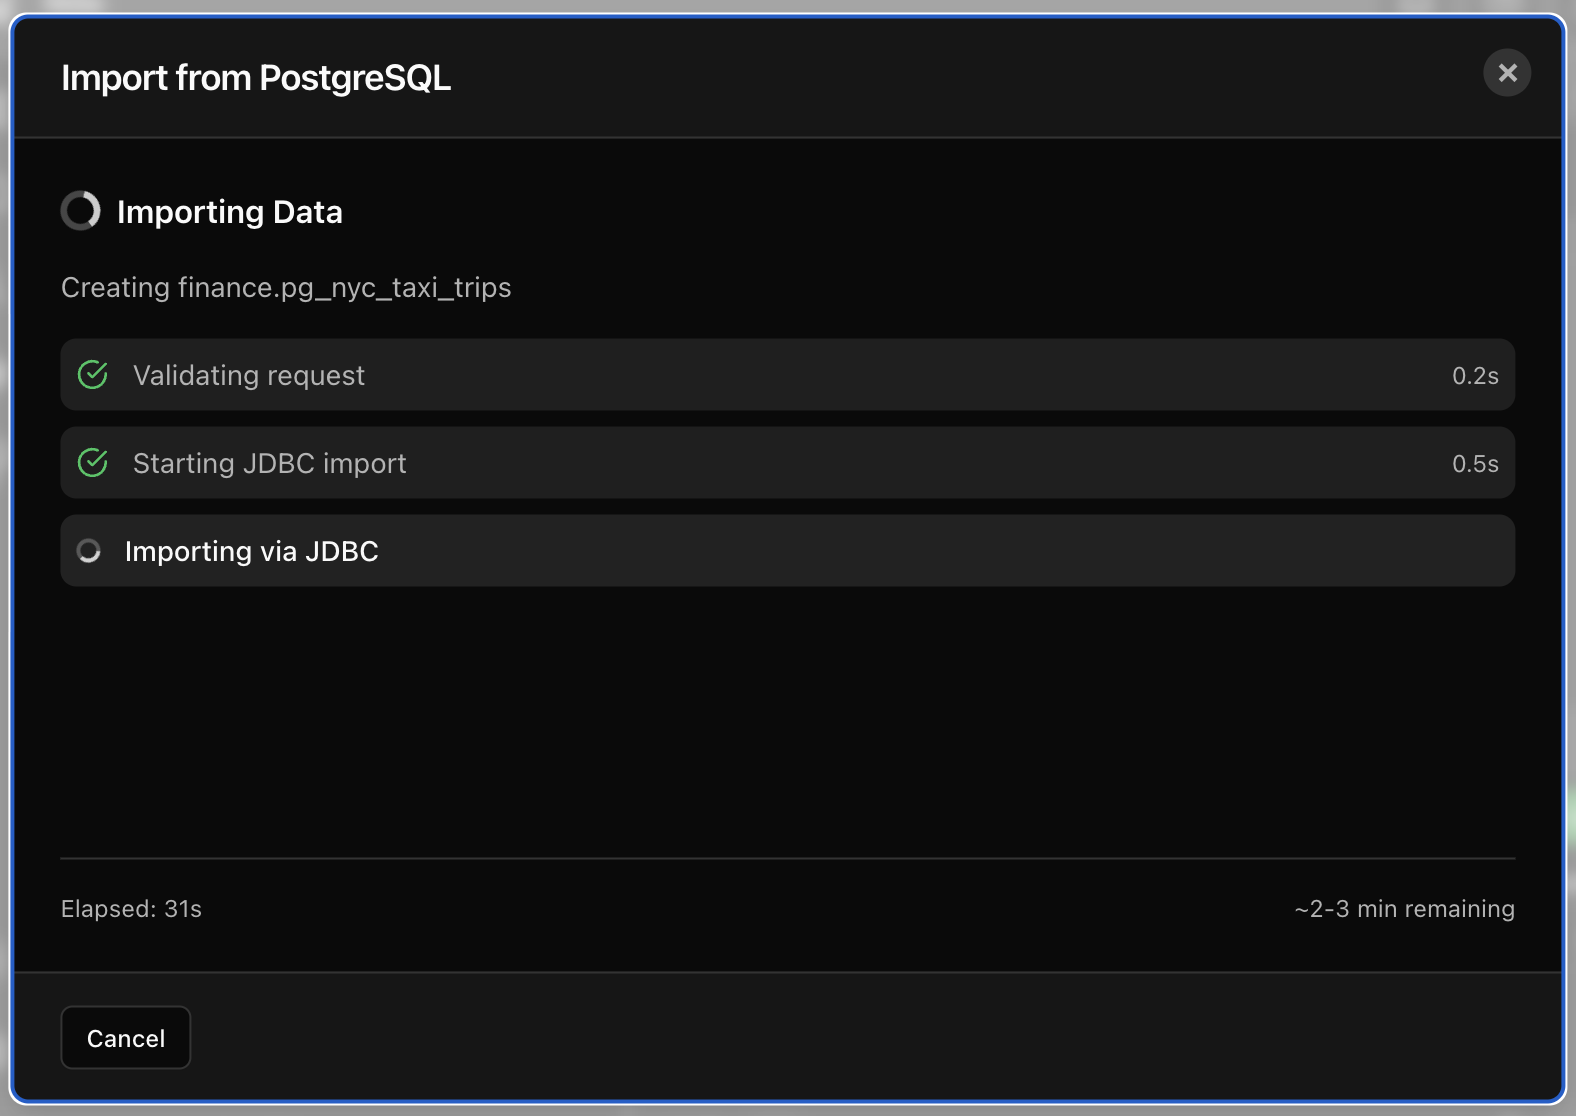
Step 5: Start Import and Monitor Progress
Click Start Import. The import runs as a workflow, and you can track progress in the Workflows section even if you close the wizard.
The progress view lists each workflow step (for example, validating the request and starting the JDBC job), shows per‑step timing, and includes an estimated time remaining based on table size. Closing the dialog does not stop the import. You can always open Workflows and filter for Import Table workflows to see the latest status.